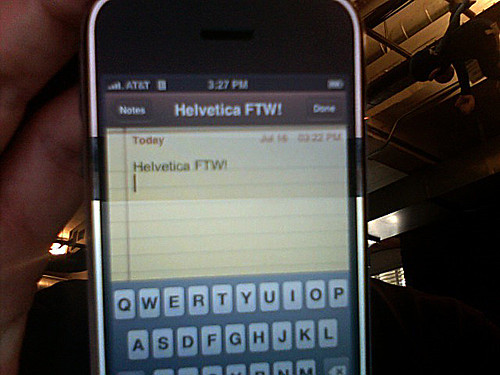
Die, Marker Felt, Die!
Like everyone else, I got sick of looking at Marker Felt on my iPhone. So I did something about it.
OK, so it wasn’t a huge amount of work; I mostly pieced together the cool shit that others are doing with the iPhone these days. If you, too, would like to (possibly) void your warranty and try it out, here’s the skinny:
Follow the custom ringtone instructions (and install ringtones, if you like) through the end of step 13 (i.e. go until
jailbreakruns successfully). At this point you’ve got read-write access to your iPhone’s root filesystem.Install MacFUSE and iphonedisk.
You have to do this because the currently available
iPhoneInterfaceshell doesn’t implement “get” or “copy” actions (lame!), but the MacFUSE one does. It does provide a nice way to make your iPhone into a hard drive, though.I had to built iphonedisk from source (a quick
makedoes the trick).Mount your iPhone by running
mount.shfrom the iphonedisk distribution.On your iPhone, check out
/System/Library/Fonts/. You’ll see the Marker Felt fonts in there. One gotcha, though: there’s a backup/cached version in/System/Library/Fonts/Cache/; you’ll need to delete the cache for your changes to take effect.I just replaced the font with the iPhone’s Helvetica font, but you could probably use any font that OSX understands…
Once you’ve hacked to your heart’s content, be sure to replace
/System/Library/Lockdown/Servives.plistwith the original (steps 18 - 22 of the ringtone instructions); you won’t be able to sync with iTunes until you do.
Bonus tip: check out the “PhonepadTwo” font – you can change it to change the numbers on the dial pad.
Update:
Added a few more details and the note about cleaning up after yourself.
By the way – be careful with your newfound iPhone freedom; I managed to
severly fuck up my phone about 30 minutes after posting this (I
recommend not trying to play with /etc/rc…).
The good news is that Apple’s restore procedure works like a charm (hold down the lock and menu buttons for about 25 seconds until you see the “Please Connect to iTunes” message).